to get a satin finish with 3M Roloc or
similar disks in a die grinder. You can
then polish this out with various rubber
wheels, felt wheels and polishing
compound, or by hand sanding with wet
or dry paper. I am usually too lazy to go
beyond the Roloc disk finish. You now
have a basic racing prop. Hopefully you
picked a prop that was similar to what
others run with the same setup. Next you
need to customize it to your boat and
motor. Remember from the previous
articles how changes vary the load on the
motor. Diameter is the most important.
If the motor won’t pull the prop or the
current draw is too high, a tiny reduction
in diameter will help. This can be done
with a small tip rounding or slight filing
on the outside diameter. Be sure the
blades match.
Reducing the blade area has a much
smaller effect if you don’t change the tip
diameter. This can be used for the final
stages of load reduction. Again, try to
keep the blades equal. Various blade
shape modifications have been used.
The Texas cut is a pure blade area
reduction. A back cut reduces blade area
and pitch if the prop was cupped or had
PROPWASH
8
March 2015
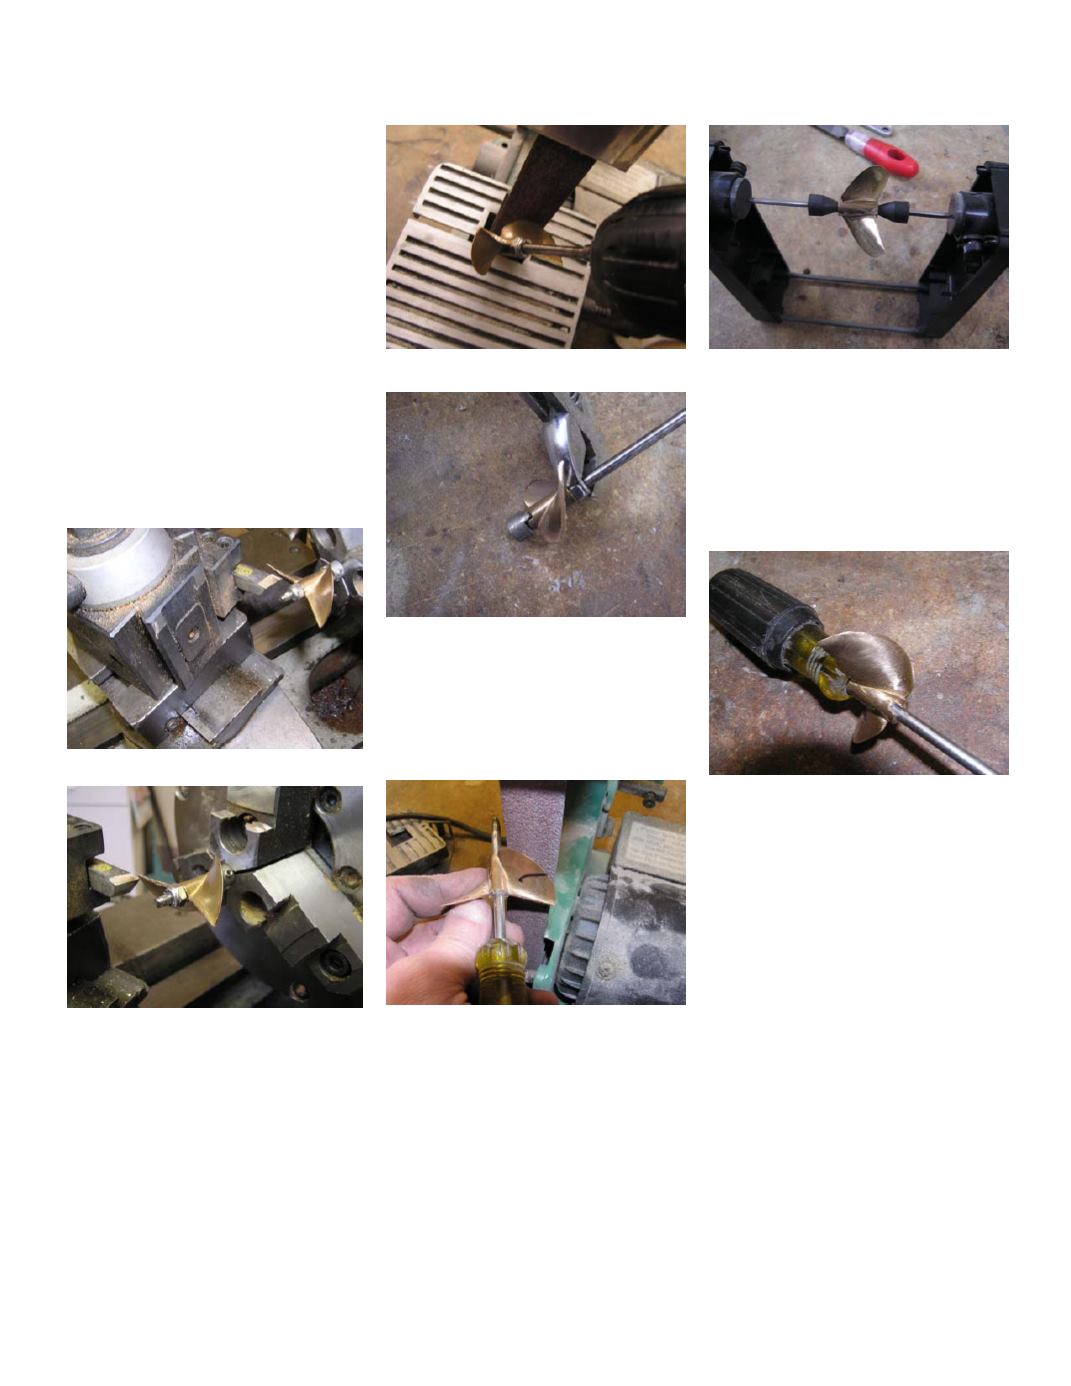
Next, sharpen the blade by sanding
on the belt sander. Remove the backing
plate to allow the belt to conform to the
blade shape. I use a screw driver, but
much fancier prop holders are available.
When the rough sharpening is
finished it’s time to thin and balance the
prop. Mount the prop on your balancer
and mark the heavy blade. Thin this
blade by grinding the forward face of the
prop until it balances. Then thin the
other blade(s) and repeat until the prop is
as sharp and thin as you would like.
There are many thoughts on how
smooth a prop needs to be. The easiest is
Props – Part 3
By Lohring Miller
NAMBA Safety Chairman
In this final installment, I will
describe how a commercially available
propeller casting can be made into a
winning prop. Lost wax casting is a very
accurate casting process, but it’s not
good enough for a model racing
propeller. Don’t let polished castings
like those from the Prop Shop in
England or Tower Hobbies fool you.
They still need work.
The first task is to match the blade
diameter and shape. This is best done in
a lathe for the outside diameter and
trailing edge. Clamp the blade on a shaft
like the one shown and carefully cut the
surfaces as in the picture.
The other parts of the blade outline
can be matched with a belt sander.
Mount the shaft in a drill and spin the
prop against the belt. Be careful not to
change the outside diameter you just
machined.
The other parts of the blade outline
can be matched with a belt sander.
Mount the shaft in a drill and spin the
prop against the belt. Be careful not to
change the outside diameter you just
machined.
Machining the Trailing Edge Angle
Sanding the Blade Outline
Edge after Roughing the Shape
Balancing
After Roloc Sanding
Machining the Outside Diameter
Sanding the Blade Face


